Saturday, December 29, 2007

How and when to buy plants

Most plants are bought at garden centers, nurseries and supermarkets. The range varies according to the time of the year, as plants in flower are the easiest to sell. Most plants are sold container-grown and can be planted at any time of the year, but the best times to plant are in spring or autumn when the soil is warm and moist, and the plants become established quickly. Summer planting requires more aftercare - you have to ensure that the plants are well watered - and in winter growth and establishment are slow.

Some nurseries and mail-order companies supply bare-root plants - grown in the soil and then dug up to sell. Bare-root plants, mostly fruit trees or roses, are sold only when dormant in winter, which is also when they should be planted.

Avoid the temptation to buy all your plants in flower at the one time, or your garden will be a one-season wonder. Instead, shop several times during the year so that you can see a wide range of different plants at their best. Staggering your purchases will also make for a more varied selection of plants.

What to Look For
Buy a tree or shrub only if it looks healthy; the leaves should be in good condition, and the overall shape compact and bushy. It should have plenty of good, strong, evenly spaced branches, especially towards the base. Ideally, there should be no weeds growing in the pot, but the odd one or two is an indication that the plant is fairly established. The plant should be clearly labeled and the potting mix moist.

A plant that has pale, yellowing leaves is possibly pot-bound, and the potting mix lacking in fertilizer. Knock it out of the pot to see if the roots are a tangled mass or if they are growing thickly through the drainage holes; in either case, do not buy it. However, the roots need to be established and should fill the pot. Avoid dry or wilted plants, those with signs of pests or diseases, or those that are lopsided or have only a few shoots, because they will need remedial pruning to put right.

Grow Japanese maples, such as this purple-leaved variety, in a raised bed or container if your soil is alkaline.

Plant Size
The largest plants are not always the best ones to choose. Often the taller ones will have started to lose leaves lower down, so pick one that has a bushy, symmetrical shape and strong growth with foliage down to the base.

The size of the plant will also affect the time that it takes to establish. A larger plant will take longer for its roots to establish in the surrounding soil than a smaller specimen, which will catch up with the larger one in a couple of seasons. However, some slower-growing shrubs, such as magnolia and Acer palmatum var. dissectum, are worth buying as large specimens because otherwise they will take many years to reach the desired size and, in the case of the magnolia, to flower. Larger specimens are also ideal for an instant effect.
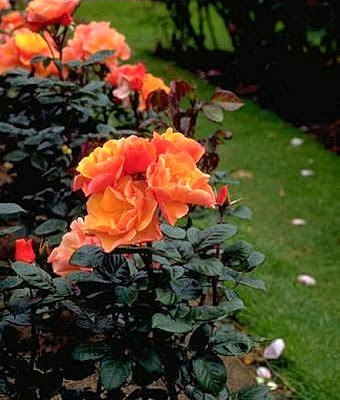
Versatile shrub roses for the garden

The name, Shrub Rose is somewhat confusing because a rose, any rose in fact, is actually a shrub. Most varieties of roses can be considered shrub roses including hybrids, modern roses, old garden roses, and even miniature roses. The term "shrub" refers to the appearance of the rose plant, which in general resembles that of a bush or shrub. Shrub roses are a great colorful alternative to use anywhere you would plant another type of shrub.

Shrub roses can be used as a screen or hedge plant for privacy, as a border, in the background, and any other way you can think to use this bountiful bush. Although the flowers from Shrub Roses carry little fragrance, they do come in a wide assortment of colors. Pink, red, white, and yellow are all common colors for a shrub rose's abundant and vibrant flowers.

Unlike many other roses, Shrub Roses are perfect for planting anywhere. They're "plant-friendly" and can mingle into any mixed assortment of flowers. In addition, Shrub Roses are very winter-hardy and they have excellent disease tolerance. These round easily-maintained bushes are not typically considered a "small" plant. Many older Shrub Roses can grow up to six feet in height. If desired, Shrub Roses can be trained to grow like hedges.

It's generally the modern shrubs that are much smaller in size. Several modern shrub roses have been popularized in recent years. Ground Covers such as Cliffs of Dover, Flower Carpet and Jeepers Creepers have been a treasure for homeowners with sloped or uneven lawns. They also grow wonderfully in hanging baskets and containers. Regardless of the variety you choose, Shrub Roses can be a wonderful feature at the entrance to your garden or home.

If you purchase your shrub from a nursery, you'll want to dig a hole that is double the width and length of the pot that contains your shrub. Use a sharp instrument to cut the plastic pot away. The idea here is to disturb the roots as little as possible. Once you have the plant free from its container, place it in the hole. Fill in the remaining space with loose soil and soak the plant with water. Make sure the plant is in a very sunny location. Generally speaking, Shrub Roses require a minimum of eight hours of full sun on a daily basis. The direct light combined with moist soil will ensure maximum flower production.

Fortunately, Shrub Roses require very little maintenance. The soil should always be moist. If you live in a climate that receives very little rain during the summer months, you'll want to water your shrubs twice a week. If you're looking for gorgeous results and optimal growth, fertilize your roses in the spring and fall with organic fertilizers. Pruning is not necessary with this shrub, as it is basically self-cleaning. Shrub roses will release their own dead foliage, creating a neat appearance through every season. Some of the prettiest roses are 'ever blooming.' Purchase this type of shrub if you're looking to purchase a recurrent bloomer that will profusely bloom several times annually.

Before you plant another green shrub, consider planting Shrub Roses instead. The most trouble you'll have with this plant is deciding which is the prettiest to bring home!

Friday, December 28, 2007

Shrubs that are easy to care for and low-maintenance

For a low-maintenance border, plant a backbone of easy-to-grow shrubs that can be relied on to give a good display every year without much attention.

Spiraea japonica 'Goldflame' (pictured above)
Young red tips turn a brassy color, then green. The foliage is best if hard-pruned each spring. Grows to 90 cm x 90 cm. A sun lover.

Camellia japonica
Large evergreen with pink, white or red winter flowers. Can grow to 4 m x 3 m over time but there are smaller types. Grow in well-drained soil in part shade.

Dwarf crepe myrtle
Deciduous shrub with summer flowers in white or shades of pink, red or lilac. The smallest type grows to only 1 meter tall.

Baeckea virgata
Evergreen shrub with long, weeping branches covered at Christmas with tiny white flowers. Will grow fast to about 2m x 2m, in full sun or part shade.

Pachystachys lutea
Erect evergreen shrub topped with spikes of yellow-and-white flowers from spring to autumn. Grows to 1.8m x 90cm, in part shade. Does not tolerate frost.

Viburnum tinus (pictured above)
A dense evergreen shrub with dark green leaves liberally dotted with small, white flowers from autumn to spring. Grows about 3 meters tall and wide. Sun or part shade.

Acalypha wilkesiana
Grown for its big evergreen leaves, splashed in various shades of red. Flowers occur in summer but the catkin-like bloom is not significant. Grows up to 3 meters tall.

Calliandra tweedii
Spreading evergreen with arching, horizontal branches and fine, ferny foliage. Crimson, puffball flowers most of the year. Grows to 3m x 5m. Full sun, frost sensitive.

Abelia floribunda
Arching evergreen with small, dark green leaves and tubular, rose-pink flowers late spring through to autumn. Grows to 2m x 2m. Prefers sun, tolerates part shade.

Hebe 'Autumn Glory'
Squat, globular evergreen with rounded leaves. Purple-blue flowers from early summer until late autumn. Grows to 75cm x 90cm. It likes a sunny position.

Dealing with the rose disease that is Blackspot

Blackspot is a prevalent rose disease that is caused by the fungus Diplocarpon rosae. Should your rose bushes develop the telltale signs of Blackspot, remedial measures must be taken immediately. Otherwise, the bush will begin producing fewer blooms and the rose's ability to survive the winter months will be jeopardized.

Blackspot is easy to recognize in its latter stages, but might not be noticeable in the beginning. In fact, by the time blackspot starts showing signs, as few as 3 to as many as 10 days have already passed since the fungus first germinated. The first visible symptom is black-colored spots on the leaves. As the disease progresses, a yellow ring forms around the black spots and the spots spread through to the underside of the leaves. Spore-producing spots will be visible upon close examination. The black spots will continue to grow and soon the entire leaf may turn yellow. Many of the yellowed leaves will begin falling off the bush.

Blackspot is a fungus and as such, it spreads. It'll easily jump from one bush to another for as long as it's left untreated. The fungus can survive on the fallen leaves through the winter, and also on the cane where it has been infected so growers cannot rely on the harsher weather to kill it.

Like most fungi, Blackspot thrives in warm, moist environments. Spores will germinate after 7 hours of being wet and when the ambient temperature is between 65 F (18 C) and 75 F (24 C). The warmer the weather, the quicker the disease spreads.

Proper care of your roses is the only way to prevent this disease from developing or spreading. Since spores can survive on fallen leaves, it's crucial during the fall season to rake up and remove all dead leaves from the ground and cut away any infected canes. In the spring, when roses are still dormant, head to the nursery and purchase wettable sulphur and a soap containing fungicide and then spray all rose bushes thoroughly with both. The spores cannot adhere to the sulphur, so the leaves are protected whenever they're covered. Because the sulphur will wash off in rain it's important to reapply whenever necessary.

The fungus needs a wet environment for germination, so take extra care to keep the leaves moisture-free. For example, plant roses in sunny locations as opposed to shady places so that the morning dew evaporates more quickly. Use sprinkler hoses when watering so that only the roots get watered and not the leaves. Water early in the day, so there's plenty of time for water to evaporate. Prune the bushes regularly so that air can flow freely among the leaves and be sure to allow plenty of space between bushes for the same reason.

When roses exhibit symptoms of Blackspot, first cut away affected parts and throw clippings in the trash, not the compost pile (remember the fungus on leaves won't die). Then spray all the leaves with sulphur.

If given a bit of tender loving care, your roses will produce beautiful flowers year after year!

Wednesday, December 26, 2007

Choosing and caring for your shrubs

The choice of easy-care shrubs is vast. Most shrubs are hardy and need either no pruning or a simple pruning once a year and many require no specific soil type or position in the garden. Even if they do require some upkeep, sometimes it is possible to cut out one or two of the regular tasks to save time, keeping the end result just as pleasing. May bushes, for example, are grown for their massed spring flowers. Normally they are pruned by removing some of the oldest stems at ground level each year after bloom. To save time, this can be done every second or third year. Alternatively, cut the plant to the ground once every five years, right after bloom.

Densely foliaged shrubs, including the rose, and ground covers such as lamb's ear and geranium, exclude light from the soil and suppress weed growth.

Mix plant types to provide more seasonal color. Here, the hakonechloa grass and the fuchsia provide summer interest.

Soil and Position
Shrubs that require special soils or positions can take up time if planted in the wrong conditions. For example, for an azalea to thrive in poor, dry clay, a lot of work will be required to alter the soil's condition. Instead, if you want to include a plant not naturally suited to the soil in your garden, grow it in a large container or a raised bed using suitable compost. Some shrubs need particular amounts of shade or sun; if you cannot provide these, it is better not to include such shrubs in your scheme.

Mature Size
Before buying a plant, consider its mature size. There is no point in planting a shrub that grows to 3 m in a position where you want it to reach only 90 cm. Most shrubs can be pruned to size, but vigorous varieties will need pruning two or three times a year to keep them under control. Planting smaller varieties in the first place saves time.

Pruning
Consider when shrubs need to be pruned, and the number of other tasks that need doing at the same time. You may have more time to prune in early spring, for example, because there is no lawn mowing or weeding to be done. But if lots of shrubs are planted that need summer pruning, it can be a drain on your time when other jobs may require doing. Avoid this by planting shrubs that need a mixture of spring or summer pruning, or, better still, no pruning at all.

Moving Established Shrubs
Deciduous shrubs should be moved while dormant, and evergreens in autumn, or winter. Dig a small trench around the shrub so that you can get your spade underneath, and lift out a good-sized rootball. To compensate for the damage to the roots, prune back the top growth of deciduous shrubs by 25 per cent to reduce transpiration from the leaves. Evergreens should not be cut back, but they will benefit from protection from drying winds. To minimize moisture loss, spray with an anti-transpirant available from your garden center.

If you've got plenty of space, then a woodland garden would be a good alternative

A woodland garden is a mini forest that requires quite a lot of room. The trees should not be so densely planted that nothing will grow beneath them. For best results choose only smaller-growing trees and space them at least 10 m apart. Too many evergreens clumped together will cast a big area of dense shade. If you mostly use deciduous trees, you will be able to grow a wide range of spring bulbs and other winter-growing plants underneath. A woodland garden is quiet, sheltered and peaceful. And it is easy to maintain, although you will need to pull out any self-seeded saplings that appear.

Looking After a Woodland Garden

Spring and Summer

Paths
Start to mow grass paths once every two weeks or so in spring. Bare paths may need topping up with fresh bark chippings.

Watering
Any newly planted trees, shrubs and perennials should be kept watered to help them become established.

Weeding
Keep a 1 meter diameter circle free of weeds and grass around newly planted trees and shrubs.


Autumn

Grass Clippings
Cut long grass with a line trimmer or heavier-duty brush cutter. Rake off clippings and use as mulch. Thin out any dense ground growth.

Clear Leaves
Rake off fallen leaves, but use some as a natural mulch under shrubs and trees. Do not over mulch as this could rot young stems.

Planting
Plant bulbs for naturalizing. This is also the best time to plant new woodland trees and shrubs.

Weeding
Clear weeds and unwanted self-seeded saplings. The rule is: if you haven't planted it, don't let it grow.


Winter

Pruning
Cut out any damaged branches or those that show signs of disease. Also cut back branches that overhang paths, in order to keep access to the woodland open.

Sunday, December 23, 2007

Watering and feeding for your garden

It makes sense to water and feed plants at the same time. Soluble fertilizers can be applied through a hose or watering can, and are available to the plant straight away. If, on the other hand, you rarely need to water the plants, a granular, slow-release fertilizer can be applied once a year, in spring, round the base of the plant.

Hose-end Feeder
Water and feed in one go using a special feeder fitted to the end of your hose. As the water rushes through the feeder, it dilutes the plant food at the correct rate, saving you the time and effort of using a watering can to apply it.


Watering a New Shrub
To make watering new plants quicker and more effective, make a ridge of soil around each plant to form a moat when it is watered. The ridge of soil will hold the water until it soaks into the rooting zone below.


Permanent Hose
Avoid having to drag a hose down a long garden by fitting a multiple snap-lock connector part-way down the garden, such as next to the shadehouse or vegetable bed, and then using a shorter hose to do the watering.

Combining Shrubs for Year-Round Color

Keep your garden looking good all year by planting a selection of easy-care shrubs, each with different attractions, making sure their flowering times vary.

Deciduous flowering
Chaenomeles x superba 'Crimson and Cold', Deutzia gracilis, Viburnum opulus 'Sterile', Weigela florida.

Evergreen flowering
Chaenomeles uncinatum, Choisya ternata, Euryops pectinatus, Hibiscus rosa-sinensis, Lavandula angustifolia 'Hidcote'.

Colored foliage
Acalypha wilkesiana, Aucuba japonica 'Crotonifolia', Codiaeum spp, Cotinus coggygria 'Royal Purple', Melaleuca incana, Pittosporum 'Silver Sheen'.

Fruits and berries
Callicarpa bodinieri var. giraldii, Eugenia reinwardtiana, Pyracantha 'Orange Glow', Syzygium wilsonii, Viburnum opulus 'Compactum'.

Autumn foliage and stem color
Acer palmatum 'Osakazuki', Cornus alba 'Sibirica', Nandina domestica 'Firepower', Sapium sebiferum.

Friday, December 21, 2007

Tips for pruning your prized roses

Pruning and deadheading are important parts of your rose care routine. There are as many different opinions about how and when to prune as there are roses in need of pruning.

While individual rosarians may have their favorite "tried and true" methods, this article is geared towards new rosarians who have no idea where to start. As time goes by you may feel the urge to modify these techniques or even develop some new ones of your own. That's great. Variety is the spice of life and anything that doesn't kill your roses can't be that bad, right?

Rose pruning isn't as complicated as some people make it out to be. In fact, there are only four basic rules and a few common sense ones. If you keep these basic rules in mind every time you pick up your pruning shears, you'll be rewarded with beautiful bushes that reflect the care that you put into them.

1. Always keep the center of your bushes free of growth. This denies insects a place to live, and allows good air circulation which helps to keep down the instances of fungus infection.

2. Always remove any dead or decayed growth. This keeps your bushes looking better and also denies disease and insects a place to call home.

3. Shape your rose bushes as they grow. This adds symmetry to your garden and transforms your bushes from wild and wooly to prim and proper like all good roses should be.

4. Remove crossing branches to promote stronger growth,

Common sense rules

Always using sharp pruning shears and clean the shears after use to remove any disease or fungus spores.

Seal the cuts you've made to keep out disease. Save your money and use regular Elmer's glue. it works just fine and it's a lot cheaper than commercial preparations.

Here's a look at common pruning terms and techniques as well as some guidelines for what types of roses to use them with.

Hard or "Low" Pruning

Cut canes back to three or four buds from the base or the bud unions. The end result is strong canes which are about 4 to 5 inches in length.

This pruning technique works best with new hybrid tea, grandiflora, and floribunda varieties. You should not do hard pruning with established bushes because they may not recycle. The only exception is as a last-ditch effort to revive sick or neglected bushes.

Moderate or Medium Pruning

Cut strong stems back to approximately half of their length. Weaker stems may be cut back even more if needed.

This technique works fine with established gardens of floribundas, hybrid teas, grandifloras, and tree roses.

Light or High/Long Pruning

Cut the canes back to around 2/3 of their length. After all unwanted wood is removed any remaining stems are "tipped".

Light pruning is not generally recommended for most bushes as it tends to produce early blooms and poorly developed flowers. Use this technique only if others are not working and the bush is an eyesore to begin with.

Planting singly or in groups? - The question about borders for your garden.

The way a border is planted can play an important part in reducing the amount of time needed for maintenance. Once you have decided what to plant, you then have to decide whether to plant the shrubs or trees singly or in groups of the same variety. One advantage of planting many of one specimen in a group is the instant impact, due to the greater area covered: instead of a single flowering shrub, you see a mass of colorful flowers, stems or evergreen foliage. However, planting in groups will reduce the number of varieties that you can fit into a border.

In a larger garden, groups create a sense of scale in proportion to the surroundings and the greater space allows you to plant more than one group. On the other hand, in a small garden, it can be better to plant a mixture of single specimens together for interest.

Wide Planting
If you want to see each plant's individual shape, you need to give them ample space to develop, so plant at the distances recommended on the plant labels or in gardening books. This will also save you the work of thinning out overcrowded plants later on. However, you will have to wait several years for the border to establish fully and this method of planting exposes more bare soil, which allows weeds to grow. To save time weeding, plant the shrubs through mulch matting, or, for a more attractive result, fill the gaps with relatively short-lived shrubs, annual flowers or even groundcovers. As the main shrub planting grows, remove the temporary fillers (many will be past their best anyway) or, in the case of ground covers, allow the shrubs to grow over them.

Close Planting
For the busy gardener, closer planting than normally recommended achieves a more instant effect because the garden looks full from the start, and it means that the plants cover the ground, smothering weeds more effectively. But it is more expensive, and later on the shrubs will need frequent pruning or removal, otherwise the whole planting will become unattractively crowded. If you do plant closely, choose several of one variety; later, selected specimens can be removed without altering the overall effect.

Easy Maintenance
Don't plant shrubs too close to paths, driveways or boundary fences. As they grow they will spread to their maximum width and you will find yourself pruning at least once and perhaps several times a year to stop them encroaching on other areas.

Clearing ground for planting takes time. Spray perennial weeds like dandelions, clover, soursop and other oxalis and onion weed with a glyphosate-based weedkiller. Dig over the bed to loosen the soil, then position your shrubs and prepare generous planting holes. Fork over the base and sides of each hole but do not add compost or manure - organic matter belongs on top. After planting, mulch the whole border with rotted manure, compost or lucerne.

Quick Results
For a new border that will look established in just one season, plant a selection of quick-growing shrubs. Choose large shrubs such as Melaleuca incana or japonica camellias for the back of the border, and the smaller may bush and Esperance wax at the front. Keep them watered and fed in their first season so that they make good growth, achieving the height and interest needed.

Monday, December 17, 2007

Making time for their peaceful garden - A case study

Louise and Phil Pankhurst are in their early fifties. They both work full-time, but like to spend time in the garden at weekends and on summer evenings. They want a garden with a Mediterranean style that will suit their sunny climate and remind them of a recent trip.


Phil Pankhurst is an information technology specialist at the university nearby. Louise is the director of a charity. They want a garden with lush-looking evergreens, and light, airy foliage. With council permission, they want to get rid of the gloomy Leyland cypress trees. Because of their busy working lives, they want no time-wasters in the garden, such as regular pruning. Their young grandchildren often come to stay, so the garden has to be safe for them to play in. Most importantly, they want somewhere pleasant to sit and relax, and where they can entertain their friends - possibly upgrading the existing terrace, giving it more privacy from the neighboring properties.

The Old Garden
Most of it is grass, with a few overgrown flowerbeds. The terrace off the house has no safety rail, making it dangerous for the grandchildren to play there. The boundaries are sharply defined by rickety fencing and Leyland cypress trees, which take a lot of light from the garden. There is little privacy from neighboring yards.

Deciding Their Priorities

How much time?
4 hours on average each week.

Essential ingredients?
Easy-care garden beds with year-round interest; a secluded area for entertaining, with built-in barbecue; child-friendly plants.

Likes and dislikes?
They like relaxing in the garden and using the terrace on summer evenings. Any garden tasks where the grandchildren can help are enjoyed. Dislikes include anything that steals a lot of time at weekends, such as watering lots of containers and weeding.

The New Garden
Climbers on lattice and a few potted shrubs and flowers create an arbor of tranquility on the terrace. The lawn is curved, making mowing easier, while an automatic watering system helps keep down the workload in the garden beds.

Intimate terrace
Siting the terrace next to the house makes for easy entertaining. Climbers bring greater intimacy.

Lush pots
Exotic 'Mediterranean' plants, such as the palm Trachycarpus fortunei, need little water.

Easy pruning
Although vigorous, the wisteria is easy to prune on the balustrade. Trim in summer, cut back hard in winter.

Boundary
Higher fencing gives greater privacy but does make the garden seem smaller. For a feeling of extra space, it has been mostly disguised by planting.

Effective planting
Evergreen shrubs help to suppress weeds and give beds an all-year structure, while deciduous trees let in plenty of winter warmth and light, and even supply free mulch.

Sweeping lawn
The gentle curve of the lawn makes maintenance easier and helps to set off the rest of the garden design.

Stone focal points
The pineapple finials provide an instant focal point and they mark the top of the flight of steps.

Improving existing borders in your garden

Sometimes old garden borders lack interest, especially if some of the shrubs are past their best. One option is to replace all the shrubs and start again, but this is hard work and will leave you with empty spaces until the new shrubs begin to grow. A quicker method is to keep some of the existing plants to provide the structure for the new border and shrubs that offer more than one season of interest, then replace the rest - in particular, short-lived shrubs such as lavender, santolina and some natives - with healthier or more interesting plants. Thus the height and structure of the border are maintained while the shrubs become established.

Once the border has been thinned, the old shrubs that are being kept may look misshapen or bald at the base. You can transform their appearance by simple pruning, taking out a few of the oldest stems each spring, but don't prune them back hard because many shrubs may not regrow or may take years to flower again.

To fill the gaps quickly, buy a few larger specimens rather than several smaller plants but don't overplant the space available or you'll soon have the same problem again. Just keep in mind what the ultimate sizes of the shrubs you are planting will be, and space them accordingly. If the old foliage is mainly green, brighten up the display with shrubs that have golden, purple or variegated foliage. Even with all this replanting, you will still have bare ground, so you may choose to use annuals as a short-term filler while the new shrubs grow. As the months pass, you will have less and less space to fill and the garden bed will need less attention.

Before planting, improve the soil by forking in a bucketful of well-rotted organic matter for each square meter, and applying a ration of complete plant food. Once the new shrubs are in, water them regularly to help them grow faster and to compete against older plants with established root systems. If you choose not to fill bare spots with annuals, lay down mulch matting or an organic mulch to retain soil moisture and minimize weed growth. But remember, the longer bare patches remain, even covered by mulch, the greater the risk of weeds.

Saturday, December 15, 2007

Making easy-maintenance borders using shrubs and trees

Trees and shrubs easily and effectively add long-lasting color and interest to a garden but, to keep down the workload, you will need to choose plants that need minimum pruning. Shrubs and trees can be used without the addition of other plants to create a beautiful planting on their own. They can also provide a permanent framework for a border that includes many other plants: for instance, they can form a background against which seasonal flowers are displayed, or they can be used individually to create a particular effect, such as a focal point. For the ultimate easy-care border, add only as many perennials and annuals as you have time to look after, because they generally need more upkeep.

Spend plenty of time planning what to put where, so you don't have to move plants around later. Walk around your neighborhood to see which trees and shrubs grow well in other gardens and which plants are invasive, and seek advice from your local garden centre or nursery. To decide on where to place a tree or shrub in the garden, especially one chosen to give height, use a cane or a tripod of canes which can be moved around the garden to give you an idea of where the new addition will fit in to best effect.

When choosing a tree, give particular consideration to its rate of growth and ultimate size, because a tree can survive for many decades, easily dominating a garden. A fast-growing plant may have the advantage of filling up empty spaces quickly, but it will need extra maintenance to keep it within bounds later on.

Decide first on the effect that you want to create - either using trees and shrubs in groups or singly - and then choose plants that suit your needs. If you want to focus the eye on the end of a garden bed to create a 'full stop', use an upright, columnar shape, such as a pencil pine, a clump of golden cane palms or the upright Taiwan cherry, Primus campanulata. To lead the eye across the garden, go for a low, spreading plant that gives a horizontal effect, such as Junipenis x media 'Pfitzeriana' or Calliandra tweedii. And for a good focal point, consider a compact, weeping tree, such as Primus subhirtella 'Pendula'. For greater impact, combine two different effects. For example, use the prostrate, horizontal Grevillea biternata with the multi-stemmed, upright Eucalyptus luehmanniana.

Color, texture and fragrance should also be considered. Trees with golden or variegated foliage, such as Robijiia pseudoacacia 'Frisia' or Acer negundo 'Variegata', can brighten up a dark part of the garden or contrast well against a dark background. Color can be used to create an illusion of space. Cool blues and purples, which fade into the background, can be used at the end of a small garden to make it look longer. To use size, color and texture in a cascading effect, plant the tallest plants at the back, graduating to the lowest in the front. Shrubs with scented foliage or flowers, such as a fragrant rose or Choisya ternata, are best near a path or doorway.

Creating interest
  • Do find out the ultimate size of the plant and its rate of growth before buying. A tree that grows to 2 meters in ten years is slow-growing.
  • Do select compact plants that require little or no pruning.
  • Do use a few large, architectural plants, such as phormiums or cordylines, to create a dramatic effect, rather than lots of fussy, small plants.
  • Don't select large, vigorous plants for a small garden. They will need constant pruning to restrict their size.
  • Do create year-round visual interest by choosing plants with leaves in contrasting sizes, shapes, colors and textures.
  • Don't plant winter-interest shrubs in a part of the garden used only in summer. Think of your needs.

Friday, December 14, 2007

Some tips for your rose exhibition day

Now that you finally have a rose garden that you can be proud of, it's time to take the next step and let others judge the beauty of your roses. Rose shows and exhibits are exciting events where you get a chance to see how your roses stack up against those from other rosarians. It doesn't matter if you win, just the experience will teach you a lot.

Before entering your own roses, take the time to visit a few rose shows so you can see how everything works.

If at all possible, try to get permission to enter the preparation room so you can see what experienced displayers do before the judging begins.

Get a copy of the rule book from the American Rose Society. Visit their web site at www.ARS.org for information.

When you decide that you are ready to enter a show, look for one that's close to home so you can keep your travel time and expenses to a minimum. There are plenty of exhibits that offer special judging classes for beginners, so try to find one of those.

Follow this timetable and you'll be ready to face the judges on the day of the show:


30 days before the show

Start the process of narrowing down you choices to the rose that you will be showing. It's easiest to start with displaying one single bloom on a stem. Be sure to select a rose with a sturdy and straight stem.

Begin preparing the rose for exhibit by cutting off all of the buds that are forming between the side of the stem and the leaf. This focuses all of the nutrients to the single bloom at the end of the stem.

Support the cane of your selected rose by staking it with a bamboo stake and some rose or twist ties. This protects the cane and helps to support the rose as it grows.

Spray fungicide when needed and promptly remove aphids and spider mites if they appear. Aphids can be removed by spritzing with soapy water. Spider mites can be lightly sprayed with plain water.

Water your roses as you normally do and apply organics and fertilizer as required.

Put together your toolkit for the day of the show. Most experienced rosarians include the following in their kits:

Several soft cloths Q-Tips Shears Plastic wrap Small, soft artist's paintbrush ARS Rule Book


Seven days before the show

Cover your selected bloom with a baggy that's secured below the bloom with a tie at night, and remove the baggie before the sun rises in the morning. Do this every night until you leave for the show.


Two or three days before the show

Cut the rose following the instructions in our "Tips for cutting roses for display" article. Cut the stem a bit longer than usual because you will be re-cutting the day of the show.

Place the rose in a florist's bucket, cover the bloom with a baggie and tie it off below the bloom. Place the bucket and rose in the refrigerator.


The morning of the show

Remove the rose from the refrigerator, place the container and rose safely in your car, grab your kit, and head for the show!

Wednesday, December 12, 2007

You need to know the climate zones for your roses

If you want to be the proud owner of a bountiful garden this year, the first thing you need to find out is which climate zone you live in. It's helpful to know that your town gets a lot of sunshine throughout the year, but that's not enough. It's actually the cold temperatures that make a difference in what you can and cannot grow in your area.


Know Your Zone

Anyone who knows anything about gardening will tell you that the most reliable source of this type of climate information is the USDA Plant Hardiness Zone Map. Consisting of 11 different climate zones covering all 50 states, Canada and Mexico, this map will help you determine what you can plant in your garden.

When you purchase plants, they'll come with a set of growing instructions that'll describe the growing conditions the plants need to thrive. It doesn't matter whether you plan to plant vegetables, flowers or plants to use as landscaping. Don't purchase anything until you've checked the USDA Plant Hardiness Zone Map and confirmed your climate zone.

The map is quite large and very colorful. Its creation was a joint collaboration of the United States Department of Agriculture (USDA) and the Arnold Arboretum (of Harvard University). The map is a compilation of years of weather data that tracked the average low (coldest) temperatures in various regions throughout the United States. Each of the different colors represents a different climate zone with Zone 1 being the region with the lowest (coldest) temperature. There, temperatures climb as low as -50 F (-45 C). At the opposite end of the zone chart is Zone 11, where the lowest temperature any time of year is always above 40 F (4 C).

The boundaries between the different climate zones for the most part lie as you would expect, with the colder zones covering the northernmost parts of North America and gradually warming the further south you go. Slight variations can be seen at points of higher elevation, again, as would be expected.

It's easy to figure out your area's climate zone. If you're online, locate a website with the USDA Plant Hardiness Zone Map and then click where you live (get as close as you can). The map will zoom in on your region and inform you of the corresponding zone. Then you'll know!


Why the Map is Important to Rose Gardening

Roses really aren't as difficult to grow as most people think. They do require regular care and maintenance, but the number one thing roses need is an appropriate climate in which to grow. There are many varieties of roses and some are hardier than others, making them better able to handle colder climate zones provided they've been given the proper seasonal preparations. If you live in a colder hardiness zone (a lower-numbered zone) you'd want to look for roses that are bred for that zone, otherwise, you might find that those same roses that looked so perfect in the nursery don't look so healthy in your garden!

Shrubs, roses and trees for your garden arrangement

Trees and shrubs form the ideal basis for an easy-care garden because this group of plants needs less maintenance than any other. Plants from this group provide interest all year round, giving a long sequence of flowers, fruits or berries, winter bark and stems, as well as variegated and evergreen foliage. Do not purchase all or even most of the shrubs for your garden at the one time: instead buy plants in every season, because you will see something new in flower every time you visit the garden centre. And don't look just for flowers, but also for interesting leaves, berries or bark.

Trees and shrubs provide the backbone of a garden's design, as their size and shape, and the color and texture of their bark and foliage can be used to great effect. Go for those that bloom reliably and are not susceptible to pests and diseases. That may mean leaving some of the most popular plants out of your plan - for instance, in very humid, warm areas both azaleas and roses are unwise choices, because they are plagued by pests and diseases that take a lot of time and effort to control. If you choose shrubs that are identified as quick growing, be prepared to spend the time pruning them each year.


Easy-care Calendar

Early Spring
Remove weeds and debris. Top up mulch to at least 5cm deep. Lay snail bait around seedlings and soft new growth.

Mid Spring
Sprinkle complete plant food evenly between the shrubs. Spot-treat established perennial weeds with a glyphosate-based weedkiller.

Late Spring
If frosts have damaged shrubs, snip off blackened shoots. If necessary, shape by pruning back straggly shoots.

Early Summer
Check roses and other shrubs for aphids and caterpillars. Use an all-purpose insecticide to minimize damage. Check watering systems to ensure all spray heads are working properly.

Mid Summer
Deadhead shrub roses not grown for hips by removing old flowerheads with 15cm of stem, cutting just above a leaf joint. Sprinkle rose food to promote flowering in autumn.

Autumn
Tidy up any debris before winter. Fallen leaves can be left as mulch on beds.


Starting from Scratch
You could assemble this border in less than half a day by planning ahead. Draw a plan and order plants in advance. Dig the soil thoroughly, incorporating well-rotted compost and fertilizer. When the plants arrive, wait for a fine day to plant them out. Then apply a mulch to keep down weeds.


Planting for year-round interest
Once this cool-climate planting is established, you need to spend only a few hours each year topping up the mulch, spot-treating persistent weeds and pruning unruly shrubs.

Monday, December 10, 2007

Cutting roses for display - doing it right

What could possibly smell or look better than a vase of beautiful rose blooms on your table or the table of someone you love? Roses, especially hybrid tea roses, are made to be cut and they can last a very long time in a vase if you follow these simple tips.

Always make sure that you cut your roses with a sharp and clean pair of shears. Dull shears will crush the rose's stem, and dirty shears can transmit disease to your other blooms.

Roses store and process their nutrients on a schedule. Hold off cutting your roses until after 3 PM when their nutrient levels are the highest.

It's too late to cut a bud when it is fully open. Choose buds which have started to open, but are only 1/3 to 1/2 of the way through the process.

Don't remove all of the leaves from the cut stem. Leave at least 3 to help feed the bloom, but cut off all leaves that will be below the water level of the vase.

Once you have cut all the roses that you will be cutting for the day, bring them inside and start the water conditioning and hardening process.

Roses can live for an amazingly long time in a vase if you understand what it takes to keep them alive.

The first threat to a cut rose's health is the air that it sucked up when you cut the stem outdoors. This little "air pocket" which entered the cut stem works its way up to the bloom where it ultimately shortens the blooms life.

That air needs to be replaced with water. The easiest way to do that is to fill a bowl with hot tap water, as hot as you can stand to put your hands into, but not scalding hot.

Add whatever floral preservative you use plus a few drops of bleach.

Now place all of the rose stems into the bowl. Do not let the buds touch the hot water.

Use your shears and cut approximately 1/4 inch off the end of each stem and leave the roses in the bowl until the water cools to room temperature.

Fill your vase with warm water, add a drop or two of bleach and a bit of preservatives. Then add your roses.

This little bit of extra work, as well as the addition of a few drops of bleach, will extend the vase life of your cut roses longer than you can imagine.

Whenever the water starts to get cloudy, remove the roses, refill with hot water, add a drop or two of bleach, and return the roses to the vase at once.

When your bloom begin to show signs of wilting, re-cut about an 1/8 of an inch from the stems and place the stems into hot water for about an hour before returning them to the vase.

Making paths and steps for your garden

Building paths and steps requires a great deal of advance preparation so it is probably best left to a contractor. Point the cracks between slabs with mortar to prevent weeds taking hold. Heavily used paths need proper foundations, but paths that are used infrequently, such as an informal path through a garden bed, can be built relatively easily. Set paving slabs or bricks to half their depth in firmed soil. Or, to set bricks or paving slabs lightly in place, fork dry mortar mix into the top few centimeters of soil, set paving units in place, and then water them.


Stepping Stones
If a strip of lawn is becoming worn from frequent use, lay stepping stones as an informal path along the line where you need to walk. Cut out patches of turf a comfortable stride's length apart and deep enough for the stones to sit just below the level of the lawn, so that the mower is able to glide cleanly over the top of them. Tread down the soil to make a firm, level base and drop the stepping stones into place. If the stones are not steady or if they are set too low, lift them and sprinkle a little sand underneath.

Wild and Woodland Paths
For rustic 'stepping stones' through a wild or woodland garden, use 10cm thick wooden rounds which are available from landscape supply companies. For a more formal effect, excavate a level channel (about the same depth as the wooden rounds) through the soil. Edge it with pressure-treated boards nailed to wooden pegs that are driven into the ground. Lay out the rounds about a stride length apart and fill the rest of the channel with bark chippings. Space closely or you will be leaping, not stepping.

Bridge Feature
Make a quick and easy bridge over a narrow ditch or a stream by positioning two or more thick, parallel wooden planks or secondhand railway sleepers across the gap. Ensure that the planks are long enough to allow at least 90cm either side of the gap. Sink the ends 15cm or more into the soil with a layer of bricks underneath to make a firm foundation.

Simple Steps
For gentle inclines where the soil is very firm and stable, steps can be cut into the slope. Make them shallow and wide for greatest stability. Cut out the shape of the steps with a spade. Then set in railway sleepers to form the risers, angling them slightly backwards and holding them in place with sturdy stakes at each end. Fill the 'treads' with rammed rubble and top up with gravel. To ensure safety, check the steps regularly and reset loose or uneven areas.

Saturday, December 8, 2007

Work-free surfaces with paving and gravel

Hard surfaces need virtually no maintenance. They can be used in all sorts of creative ways in place of a lawn. For instance, you can create a courtyard garden enclosed by walls, a Mediterranean-style garden surrounded by evergreens, a minimalist Japanese-style garden, a walkthrough rock garden, a modern patio or a traditional, formal terrace.

Gravel
The quickest and easiest surface to lay yourself is gravel. It is also very versatile, making it ideal for use in a garden that you may want to alter later. You can plant through gravel that has been laid over mulch matting. Gravel also makes an ideal surface for a courtyard. Several sizes and colors are readily available from landscape supply companies.

Pavers
Once good foundations have been established, pavers are quick to lay. Point the cracks between them with mortar to prevent weeds getting a foothold. Pavers need not be dull. They are available in various shapes, sizes, colors and surface finishes, including some that resemble natural stone. The pavers can be laid in different patterns and combinations of types of finish for an unusual effect. Textured finishes are non-slip, but you should avoid deeply textured patterns because they trap soil, are difficult to clean, and encourage moss and algae.

River Stones
Although time-consuming to lay, rounded river stones are good for decorative detail in small areas such as between pavers or around a fountain or other feature. They are also useful in awkward corners and, because they are hard to walk on, for discouraging people from areas where you don't want them to go. For a successful low-maintenance finish, bed the stones in cement so that weeds are not able to grow up between them. Pebbles, which are smaller stones with rounded shapes, can also be used.

Bricks and Concrete Blocks
These take longer to lay than pavers because they are smaller, but a wide range of effects can be achieved from the colors and styles available. Old bricks look irregular and give a rustic appearance but, if you have a new house, use new bricks or small clay pavers of the same color as were used in the house. Bricks can be laid in traditional patterns, in a basket-weave or herringbone style, or in more adventurous designs, such as a sweeping arc. Concrete-block paving, available in a range of colors, is easy to lay on an 8cm layer of river sand over a firm base. Timber decking Wood will blend in naturally with any garden design, and is easier on the eye and more forgiving underfoot than paved surfaces. Either pressure-treated softwood or hardwood is used. Hardwood will last longer but costs at least three times as much. Timber decking is available in self-assembly kits, or you can hire a specialist contractor to do the job for you.

Decorative Finishes
Colored, moulded surfaces can be cast by specialist contractors who re-create traditional finishes, such as those of cobbles or natural stone. No cracks are left for weeds to colonize. The surface can be laid over existing paving.


Good foundations

Laying hard surfaces
Paving work takes time and skill so, unless you are keen on DIY, it is advisable to employ a contractor. Surfaces that take the weight of garden furniture or equipment, or are frequently walked over, need proper foundations - at least 10cm of road base well packed down (best done with a hired plate compactor). Patios should slope slightly so that rainwater runs off them away from the house.

What is the All-American Rose Selection (AARS)?

Did you realize that there's an organization of rose enthusiasts who actually care that the roses you purchase live up to the highest standards of quality? Well there is and most people don't even know this organization exists. Most consumers probably take for granted a rose's beauty and heartiness because they think that's just the nature of the rose. After all, how else could this elegant beauty have survived through countless centuries?

Well it might surprise you to know that not all roses are worthy of the AARS' Seal of Approval. If a rose cannot measure up to the strict standards set forth by the AARS, the All-American Rose Selections, then it won't get this seal that since 1983 has become synonymous with quality in the world of roses.

This not-for-profit organization of introducers and growers of roses prides itself in evaluating roses not only on how well they look, but also how well they can deal with various changes in climate and even how well they can ward off the peskiest of pests and disease.

For two long years, several new rose specimens are grown in approved test gardens that are located all over the United States. These testing areas are located in California, Massachusetts, West Virginia, Illinois, Wisconsin, Washington and 13 other states of varying climate zones to see how well each specimen can tolerate the different weather patterns.

Those in charge of the test gardens have agreed to follow the growing guidelines developed by AARS, ensuring consistency throughout the evaluation phase. The guidelines are not overly complex. They've been developed in a way that the average rose grower can understand which also helps to ensure that if a rose does ultimately receive the AARS Seal of Approval it can be successfully grown and maintained by anyone, regardless of their level of rose-growing expertise.

Besides the climate, the rose specimen under evaluation receives numerical scores in many other areas including its fragrance, its color when it opens and when it peaks, its foliage, its ability to flower, its buds, stems and flowers, its vigor and finally its overall value.

Each year several new specimens pass the test and are awarded the AARS Seal of Approval. The 4 winners for 2006 are: Julia Child, an old-fashioned grand dame, just like its namesake with a buttery gold color and excellent disease tolerance; Rainbow Sorbet, a floribunda with a medium sized flower in a bright mix of orange, yellow and red; Wild Blue Yonder, a grandiflora with shades of lavender and the scent of citrus and rose; and Tahitian Sunset, a grand hybrid tea that produces peach-apricot-pink flowers 5 inches in diameter with up to 30 petals each, finished off by the scent of licorice.

Remember, part of the testing criteria is that the AARS winners must be easy to grow by an average-skilled gardener. So make plans to visit your local nursery or garden or home center this spring to snatch up these best of breed roses. They're also available online and via mail order.

Friday, December 7, 2007

Climbing roses for a gloriously romantic garden

Colorful climbing roses can add a dramatic effect to your home. They're nice because you can wind them around a trellis, a column, or even let them climb up the side of your home. It's interesting to note, however, that many seasoned gardeners fear climbing roses. This is likely because of the belief that climbing roses can get damaged by cold weather and also because they can take years to reach full maturity. Despite these facts, there is a wide selection of climbing roses that can sustain harsh weather.

The best time to plant any type of climbing rose is early spring. Follow this advice and your roses will have about six or seven months to become established before the cold sets in. Before choosing climbing roses for your home, you should first get acquainted with the three distinct categories of climbing roses: ramblers, trailing roses, and true climbers.

The most intrusive climbing roses are the ramblers. These exuberant roses can grow up to twenty feet in one season. Although most of the roses from ramblers are quite small, many of the newer varieties produce large roses. Unfortunately, ramblers have a tendency to be susceptible to mildew.

If you're looking for a climbing rose that is tougher and less prone to mildew and disease, your home might need the touch of trailing roses. These climbers look great planted along walls. It's suggested that you stake them because otherwise, the long canes will grow along the ground instead of upright. Trailing roses typically bloom approximately two to three inches in diameter. Two of the more popular trailing roses are the cultivars and Rosa Wichurana.

If you enjoy climbing roses with large flowers, true climbers may be what you're looking for. These types of roses produce flowers in large clusters. There are two categories of true climbers: bush climbers, and climbing hybrid teas. Bush climbers will continue to bloom throughout the season, while climbing hybrid teas may only last for a few weeks out of the season. The bush climber has more resistance to mildew and disease than the climbing hybrid teas.

Planting your roses is an easy task. The first thing you'll need to do is choose an area to dig a hole. Your hole should be approximately one foot from your trellis or arch. Once you've dug a hole, you'll also need organic matter. Well-rotted manure or compost should be added to the soil. Next, carefully remove the rose from its container. If you come across tangled outer roots, gently untangle them with your fingers. Place your plant in the hole and fill it in with any extra soil. Water it thoroughly once you've planted it.

You should water your climbing roses at least once a week. The soil should be saturated. Once your rose's canes have grown long enough to reach the trellis or arch, tie the canes to the structure. Unlike a vine, which is equipped with tendrils, climbing roses have to be attached to a structure. You can tie them with a soft cloth or string. The idea is to give the canes enough room for growth and expansion. Be sure not to tie them too tightly.

Choose the right roses for your home and watch them climb for years to come!

A garden for the whole family

Families make many conflicting demands on a garden. Children need space to play and keep pets, while adults want an attractive environment in which to relax and entertain friends. The design of a family garden needs to reflect these different requirements and be flexible enough to evolve as the family grows up.


Child friendly plants

There are many easily grown, non-toxic plants soft enough to do no harm if children fall against them, yet resilient enough to survive garden games.

Shrubs for sun
Acalypha, bottle-brush, buddleja, calliandra, cistus, fuchsia, hebe, lavender, murraya, rosemary, santolina, senecio and spiraea.

Shrubs for shade
Camellia, cornus, euonymus (evergreen), grapto-phyllum, hovea, hydrangea, kerria, Philodendron selloum, viburnum, vinca.

Perennials for sun
Achillea, agapanthus, artemisia, calamintha, coreopsis, geranium (cranesbill), heliotrope, kangaroo paws, salvia and catmint (Nepeta).

Perennials for shade
Ajuga, Alchemilla mollis, clivia, bergenia, brunnera, epimedium, Japanese anemone, lamium, Viola hederacea and V. odorata.


Cuddly plants
Bunny's ears (Stachys byzantina), Jerusalem sage (Phlomis fruticosa), Salix lanata, Salvia argentea, Verbascum olympicum.

Wednesday, December 5, 2007

Ground cover alternatives for your garden

Where you want the low openness of lawn but not the work associated with it, a spreading ground cover can be the ideal choice. You won't be able to walk, lie, play games or wash the car on it, but once it is established and is forming a thick cover over the ground, your only work will be to water it when necessary and perhaps to pull out the occasional persistent weed.


The best ground cover is one that spreads quickly in all directions from the planting point and which grows thickly enough to exclude light from the soil, thereby preventing weeds from growing. Many climbers can be used as ground covers, Chinese star jasmine and Hardenbergia violacea being two of the best for this purpose. But there are also shrubs that cover the ground, such as the grevilleas 'Poorinda Royal Mantle’, 'Fanfare' and 'Bronze Rambler', or Lantana montevidensis with its masses of mauve or white flowers. Other good choices include the soft-stemmed but tough Convolvulus sabatius which grows in sun or shade, Scaevola aemula, an Australian perennial which covers itself in deep blue flowers for months on end, and arctotis, a South African perennial with big colorful daisies over its grey, lobed leaves. There are dozens more but don't be tempted to plant one of everything. Instead, choose only one to cover the whole area - after all, lawn consists of one species that looks good by itself.

Before establishing ground covers, it's important to kill off everything that grows in the chosen area now. If you don't, you'll have grasses and weeds coming up through the ground cover later, creating an untidy appearance. Spray the area with a herbicide, then, after a few days, when the chemical has started to work, water thoroughly to encourage seeds to germinate, and spray again. It may be necessary to treat the area a few times, so don't be in a hurry to put in the new plants. A permanently weed-free result is well worth the wait.


Good Ground Covers

Anything that covers the ground densely, preventing light from reaching the soil, is a ground cover - and that can include big, spreading evergreen shrubs that provide thick foliage right down to the ground.

Taller, shrubby ground covers
Leptosperrnum flavescens 'Cardwell', Crevillea 'Superb', Bauera rubioides, Euryops pectinatus, Baeckea virgata 'Nana', diosma, Eranthemum pulchellum.

Lower, shrubby ground covers
Hebe propinqua and other hebes, many of the ericas (heaths), Banksia spinulosa, Lavender 'Hidcote', Epacris microphylla, cushion bush and curry plant.

Cround-hugging plants
Evolvulus pilosus, Crevillea 'Poorinda Royal Mantle', Hibbertia scandens, ox-eye chamomile (Anthemis), snow-in-summer, Pratia pedunculata and creeping thyme.

Shade-tolerant plants
Baby's tears, mondo grass, Chinese star jasmine, Heterocentron elegans, Houttuynia cordata, Lamium maculatum, Plectranthus cilistus and Pachysandra terminalis.

Old garden roses can produce that antique and aristrocratic look for your garden

Old Garden Roses are any of the rose varieties that were recognized and celebrated prior to 1867, the year in which the first modern flower was introduced. The name of this flower is the hybrid tea. The major classes of Old Garden Roses include: bourbons, noisettes, portlands, species, centifolias, albas, chinas, damasks, hybrid perpetuals, moss roses, gallicas, and teas. Although some of these roses are native to the United States, the majority are from Europe and Asia. The roses that are often referred to as "Old Fashioned," or "Antique Roses," have actually served as the predecessors to some of the most beautiful modern hybrids.

Unlike Modern Roses, which are applauded for their vibrant colors, compact buds, and recurrent blooming, 'Old Fashioned' Roses are usually pastel in color and are single blooming. Their much-anticipated annual blooms have come to symbolize the arrival of summer.

These flowers are true survivors. Most Old Garden Roses are hardy even in some of the coldest and poorest weather conditions. It's as if they can withstand anything. Their versatility can rarely be matched by other classes of roses. Despite their durability and strength, these roses flourish best when planted in a favorable situation. The roses require a minimum of six hours in direct sunlight on a daily basis. The ideal location for your Old Garden Roses is an open area, away from shade-producing trees. The soil in this area should be well-drained and fertilized prior to planting.

While many people ignore the fertilization process, soil preparation is a very important element in growing healthy beautiful roses. You should add a large quantity of organic material such as manure to the flower bed prior to planting. The fertilizer will enrich the soil and aid in water drainage. It's highly recommended that you prepare your garden several months in advance to allow the nutrients to settle. Your Old Garden Roses will prosper in this rich environment.

Once your flower bed is prepared, you're ready to begin planting your roses. Although it's a little dirty, it's a very easy task. Dig a hole about eight inches deep. Remove the plant from its plastic pot. Carefully untangle any loose roots and place the plant directly into the hole. Fill any remaining space with loose soil. You won't need any soil additives at this time. Just be sure to saturate the ground with water. Your new plant will require water on a daily basis for three weeks. If the ground looks like it's very dry, give your plant a quick shower.

Although many people don't like the appearance of mulch, it can truly be a gardener's best friend. Mulch really helps to repel weeds. It's also great for holding moisture, which encourages your flowers to bloom radiantly in the summer months. Don't worry about diseases unless you see strange spots on the foliage. Although Old Garden Roses have been known to be disease resistant, it doesn't mean they're 100% disease-free. However, it's very rare that a disease will debilitate these plants. They're extremely tough and very self-maintaining.

If you're looking for something new to plant in your rose garden, select any of the Old Garden Rose varieties. The blooms and fragrances will please your senses and are the reasons why these roses have withstood the test of time.